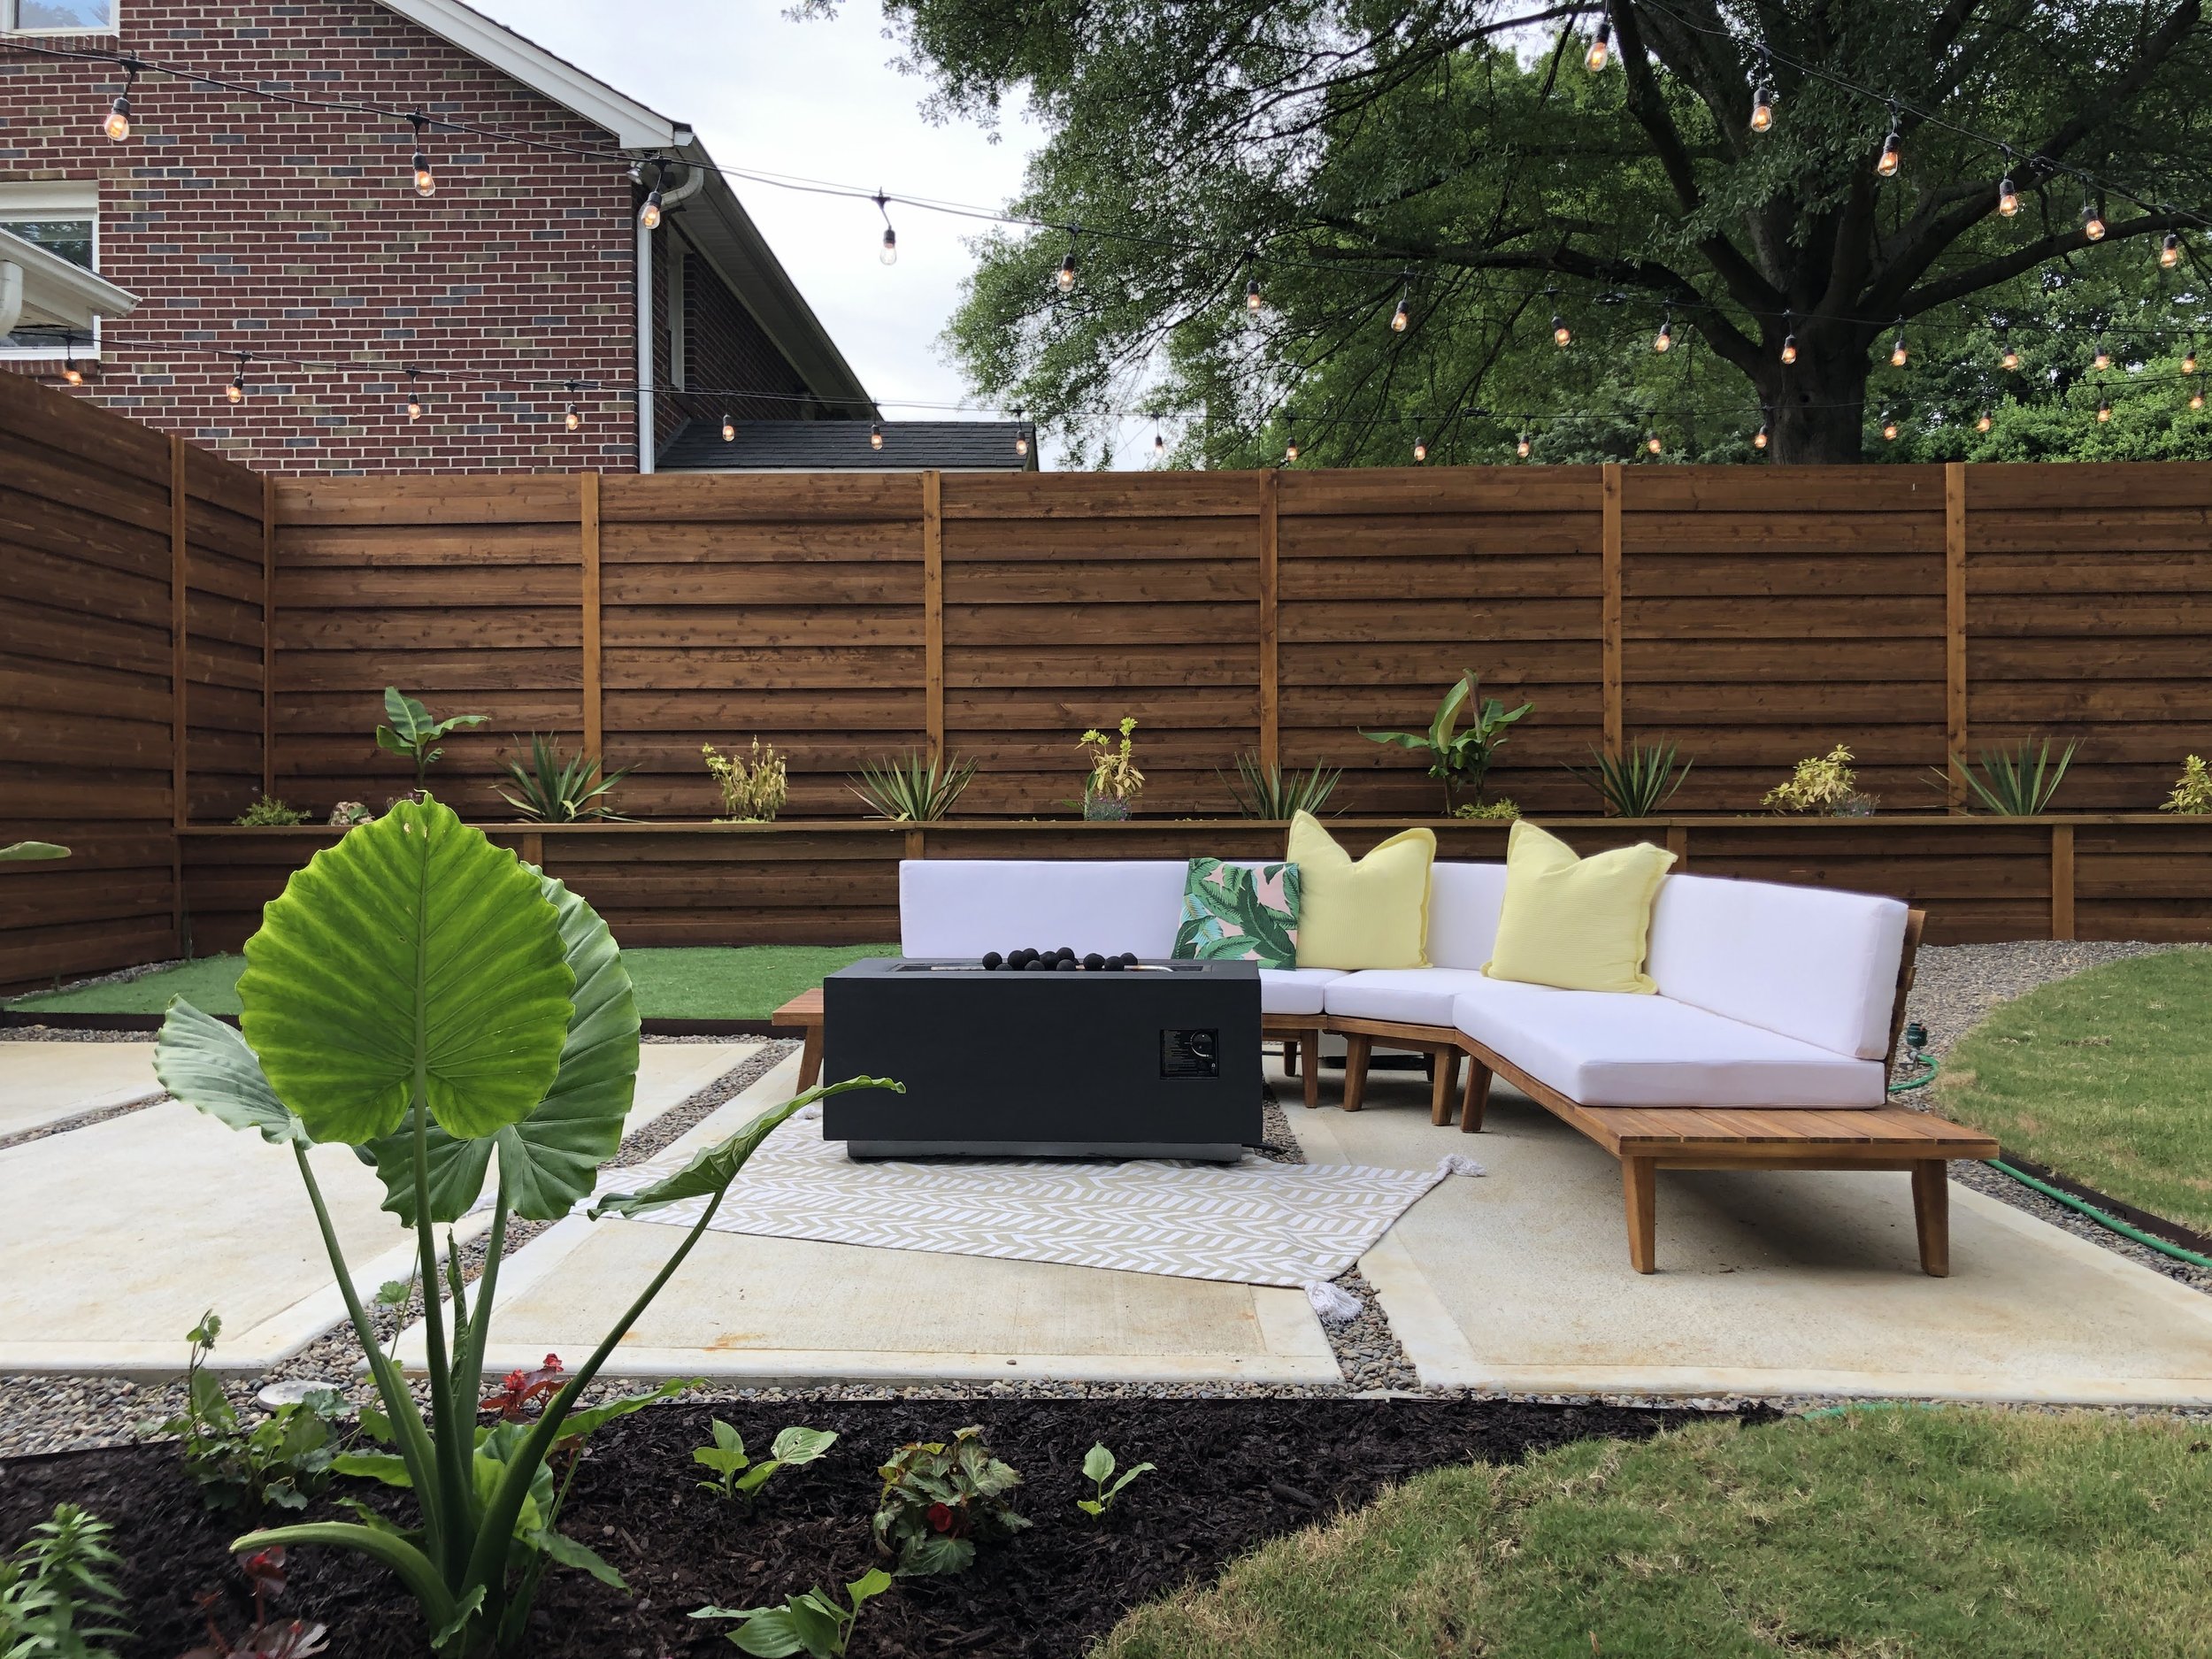
Good fences make good neighbors…
Modern Cedar Fence
Recreate this modern cedar fence with the step-by-step instructions below!
-
Materials Per Fence Section:
2 Galvanized Steel Fence Posts (I used the smaller line posts)
1-2 Bags of Fence Post Concrete (or High-Strength)
1 Ground Contact Pressure-Treated 2x6 (I used 12 ft lengths to span two fence sections)
2 Ground Contact Pressure-Treated 2x4x8s
6-8 U Brackets and/or Oz-Post Steel 2 Wood Fence Post Brackets
Kreg Pocket Hole Jig and Exterior Pocket Screws (optional)
6 inch Cedar Fence Pickets (number of pickets will depend on the height of your fence)
2 3/4x4x8 Cedar Appearance Boards
Exterior Stain (I used Wood Defender in the Leatherwood color and love it)
-
Materials Per Fence Section:
2 Ground Contact Pressure-Treated 4x4x8s
1-2 Bags of Fence Post Concrete (or High-Strength)
6 inch Cedar Fence Pickets (number of pickets will depend on the height of your fence)
2 3/4x4x8 Cedar Appearance Boards
Exterior Stain (I used Wood Defender in the Leatherwood color and love it)
-
Measuring Tape
Shovel
Fence Post Driver (Method 1)
Fence Post Level
Miter Saw or Circular Saw
Drill
Driver Bits for Bracket, Bolts and Screws
Level
Nail Gun and Air Compressor (optional)
Paintbrush
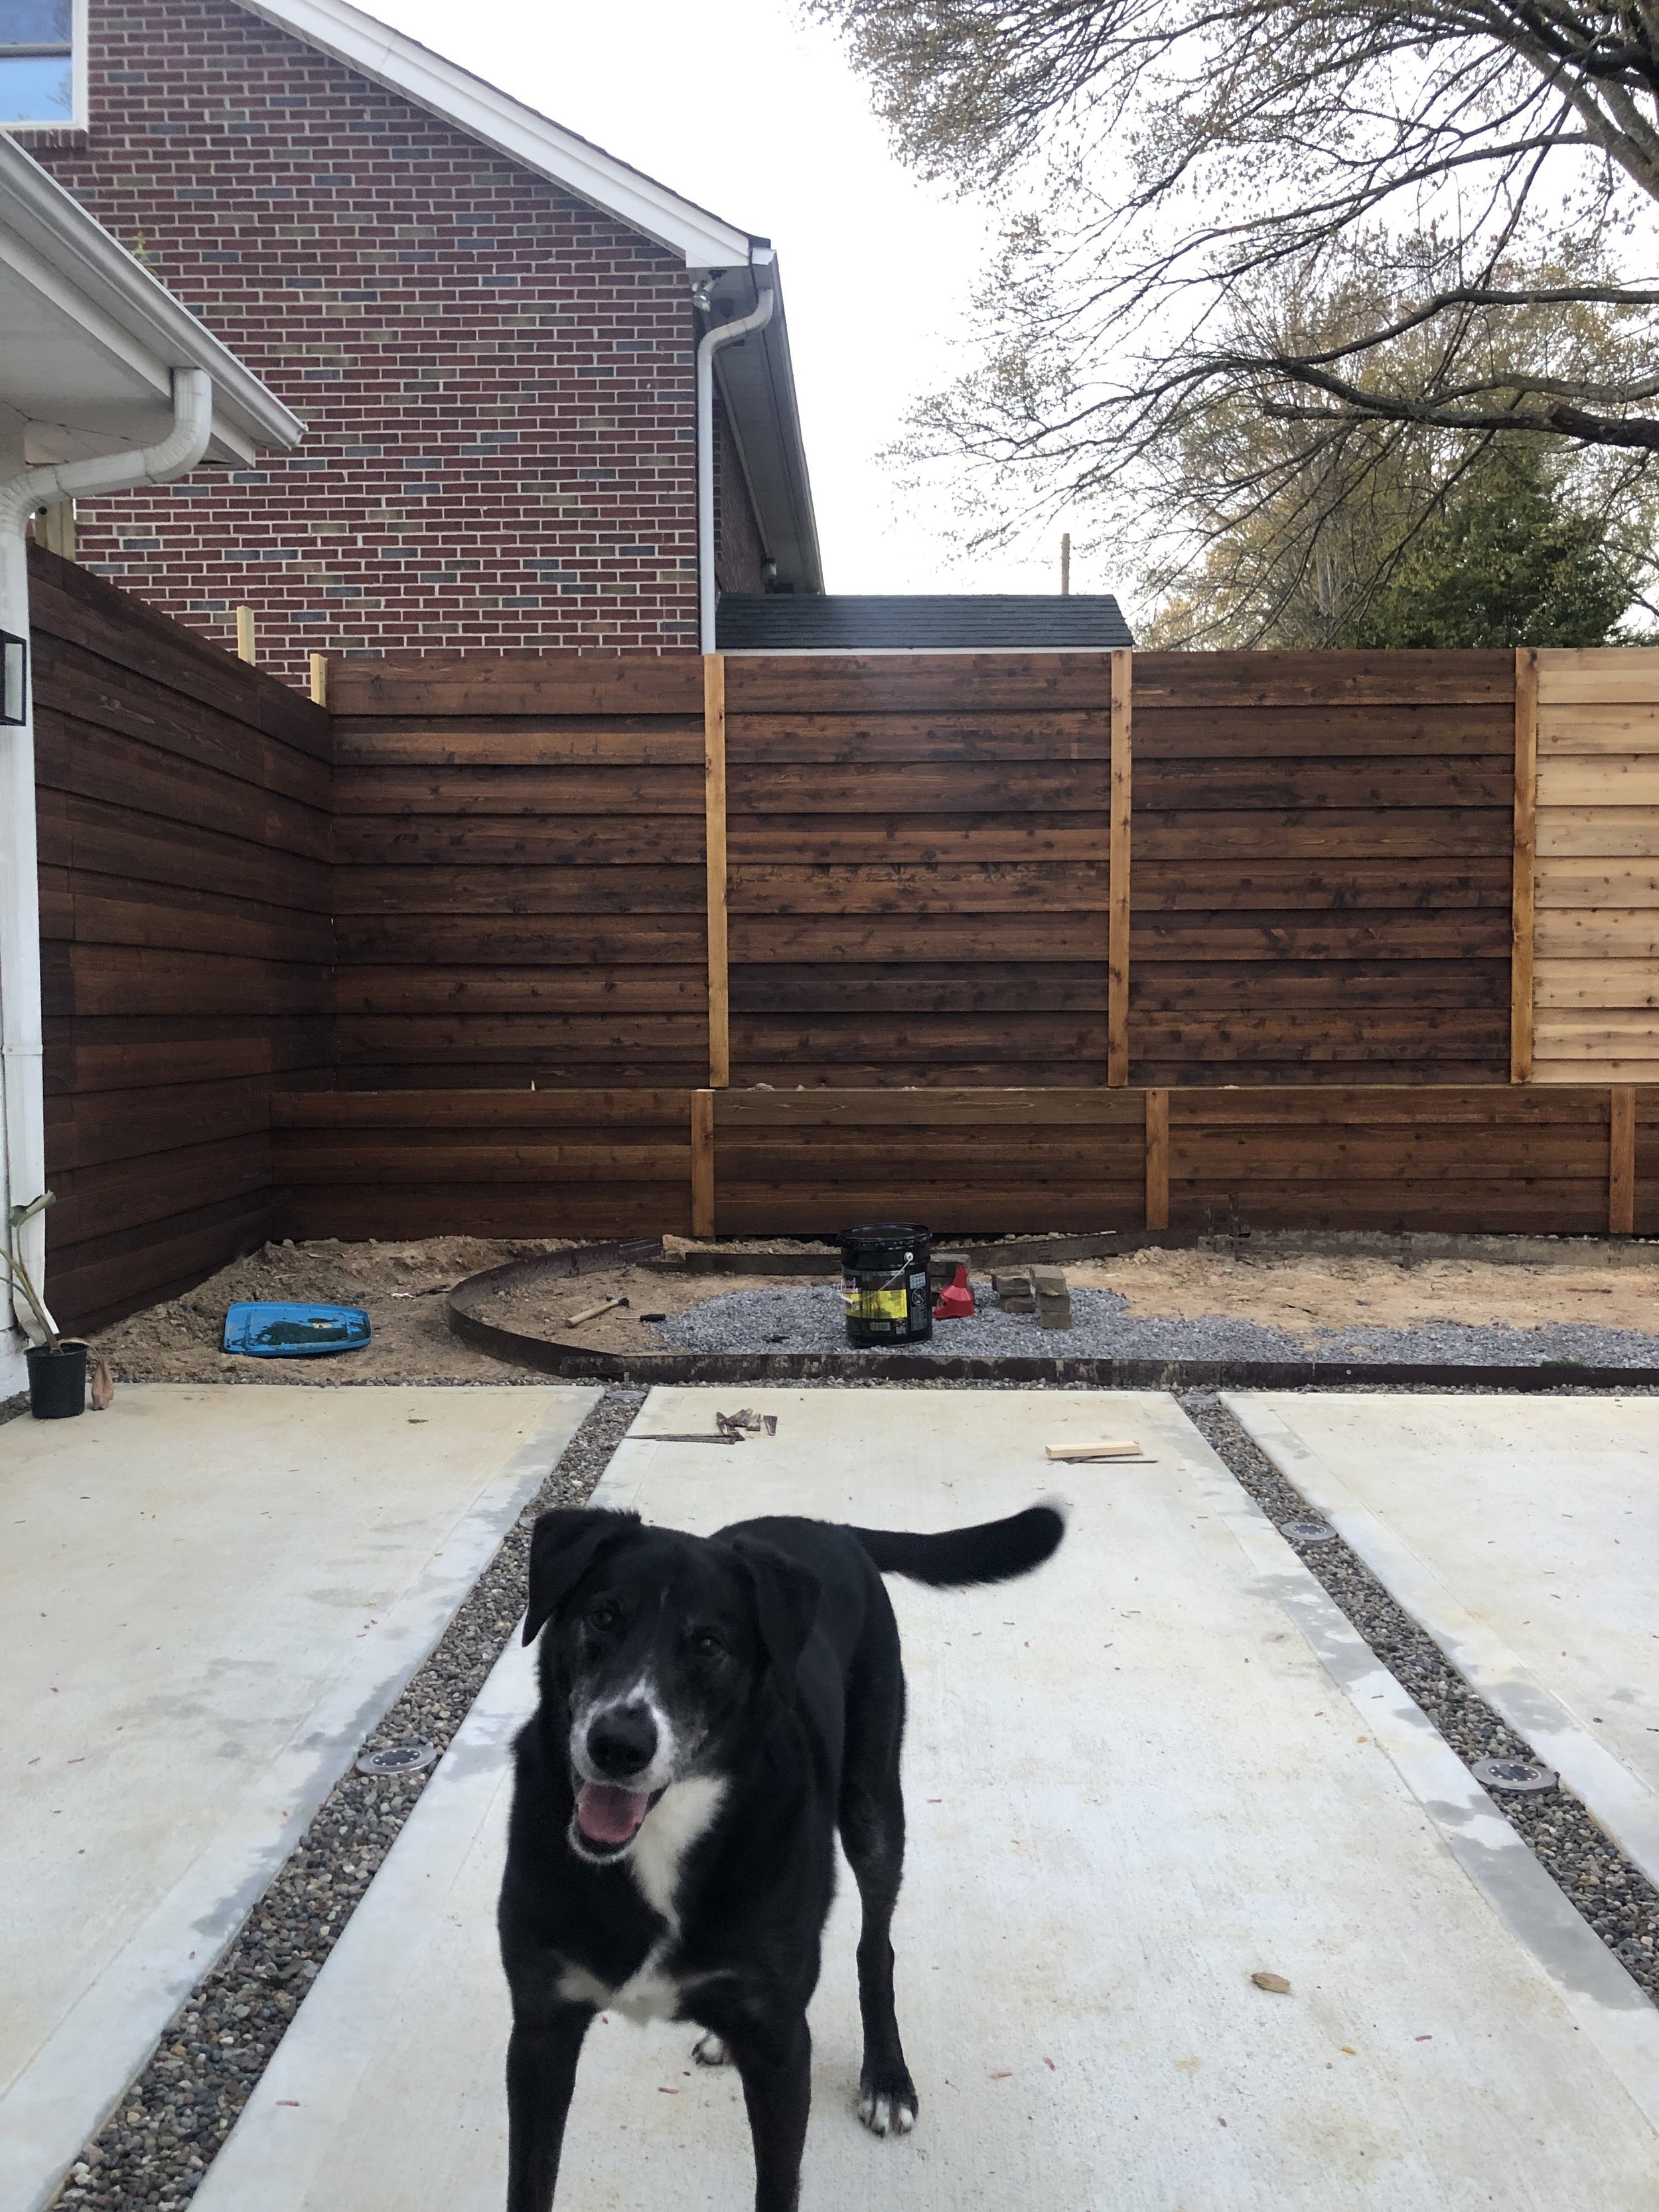
I used two different installation methods for the different sections of this fence. Method 1 utilizes steel posts with 2x4s mounted on the front and Method 2 utilizes ground contact pressure treated 4x4s. You’ll notice Method 2 requires significantly fewer materials and is less time consuming, but you should consider your location, soil type, and code requirements when determining which method to use. Please consult your local regulations and do your research when deciding how to install your own fence!
Check out our Instagram highlight for more details about Method 1 and watch a quick overview about Method 2 below.
-

Determine Number of Fence Posts & Set 6' Apart
If you want to make this project as easy as possible, space your fence posts the same distance as the length of your cedar boards (mine were 6 ft.). Dig your holes at least 18"-24" deep and set using fence post concrete. This specific concrete is designed to set quickly and hold the posts level almost instantly. Use a hands-free level like the orange one shown above to make minor adjustments as you pour the concrete.
-

Method 1 Only - Attach 2x6 Boards Level Across Bottom Edge
Depending on how far apart you spaced your posts, you can use 8' or 12' ground contact pressure treated 2x6 boards. Cut to length, if necessary, and mount the brackets to your boards. Ensure your boards will be level by placing each bracket the exact same distance from the top of the board (mine were each 1.25" from the top edge of my 2x6). Attach the board to the fence posts. level, and secure the brackets.
-

Method 1 Only - Mount 2x4s to Steel Posts and Secure with Brackets
This is likely overkill, but before mounting my 2x4s to the steel posts, I drilled two pocket holes in the bottom of each, which allowed me to secure the board to the 2x6 using exterior-rated pocket screws. Mount the ground contact pressure treated 2x4x8s to each steel post using U brackets and Simpson Strong Tie screws. I left my boards at 8' so I could determine the height of my fence later.
-

Attach Cedar Boards to 2x4s or 4x4s
Each section of your fence will have two overlapping "layers." Start at the bottom with your first cedar board. I used two scrap 1x4 pieces as my spacers to create a uniform gap between each cedar board. Work your way up the fence, ensuring each board is level and attach with two screws on each end. Attach the second layer of boards in the same manner, making sure that the overlap is equal on both the top and bottom of each board. Once you've determined the desired height for your fence, trim your 2x4s or 4x4s using a jigsaw, circular saw or hacksaw.
-

Cover Gaps Between Sections with 3/4x4 Cedar
If you are using dog-eared pickets as I did, there will be a gap between the cedar boards on each section. Use 3/4x4 cedar (or pressure treated) appearance boards to cover the gaps and attach with a nail gun. When shopping for your lumber, make sure you use "appearance grade" boards as they have a nice, square edge and are smoother than regular lumber.
-
Stain With a Brush or Sprayer
The final step, and most fun in my opinion, is to stain your fence using a brush or sprayer (this option did NOT work for me). I used Wood Defender stain in a transparent "Leatherwood" color and was so happy with how it turned out. I brushed my stain because the super-cheap sprayer I got clogged almost immediately. It took a bit longer than spraying would have, but ultimately I think the finish turned out better.
Want to take it up a notch? Add on any of these elements for extra style.
-

Retaining Wall Planter
If your fence sits on a slope as mine does, add a retaining wall to create a large, permanent planter!
I used scrap 4x4s instead of steel posts for the retaining wall and attached ground contact pressure treated deck boards across the back to create the interior wall. I stapled weed barrier inside the wall, then back filled with gravel and dirt. The process for the front of the retaining wall was the same as the fence, using overlapping cedar boards and appearance boards for trim. I topped the wall off with a wide pressure treated 2x8 to serve as extra seating.
-

Post Trim
Trim the steel posts on the back of your fence so your neighbors have a great new view too!
To trim a post, I used three 1x4 pressure treated appearance boards and a nail gun. You could use cedar boards for this as well, but I wanted to cut costs for this part of the project. Attach a 1x4 on both sides of the post, nailing it into the edge of the 2x4. Attach the front 1x4 between the two side pieces and nail. I used my scraps to cap the top as well.
-
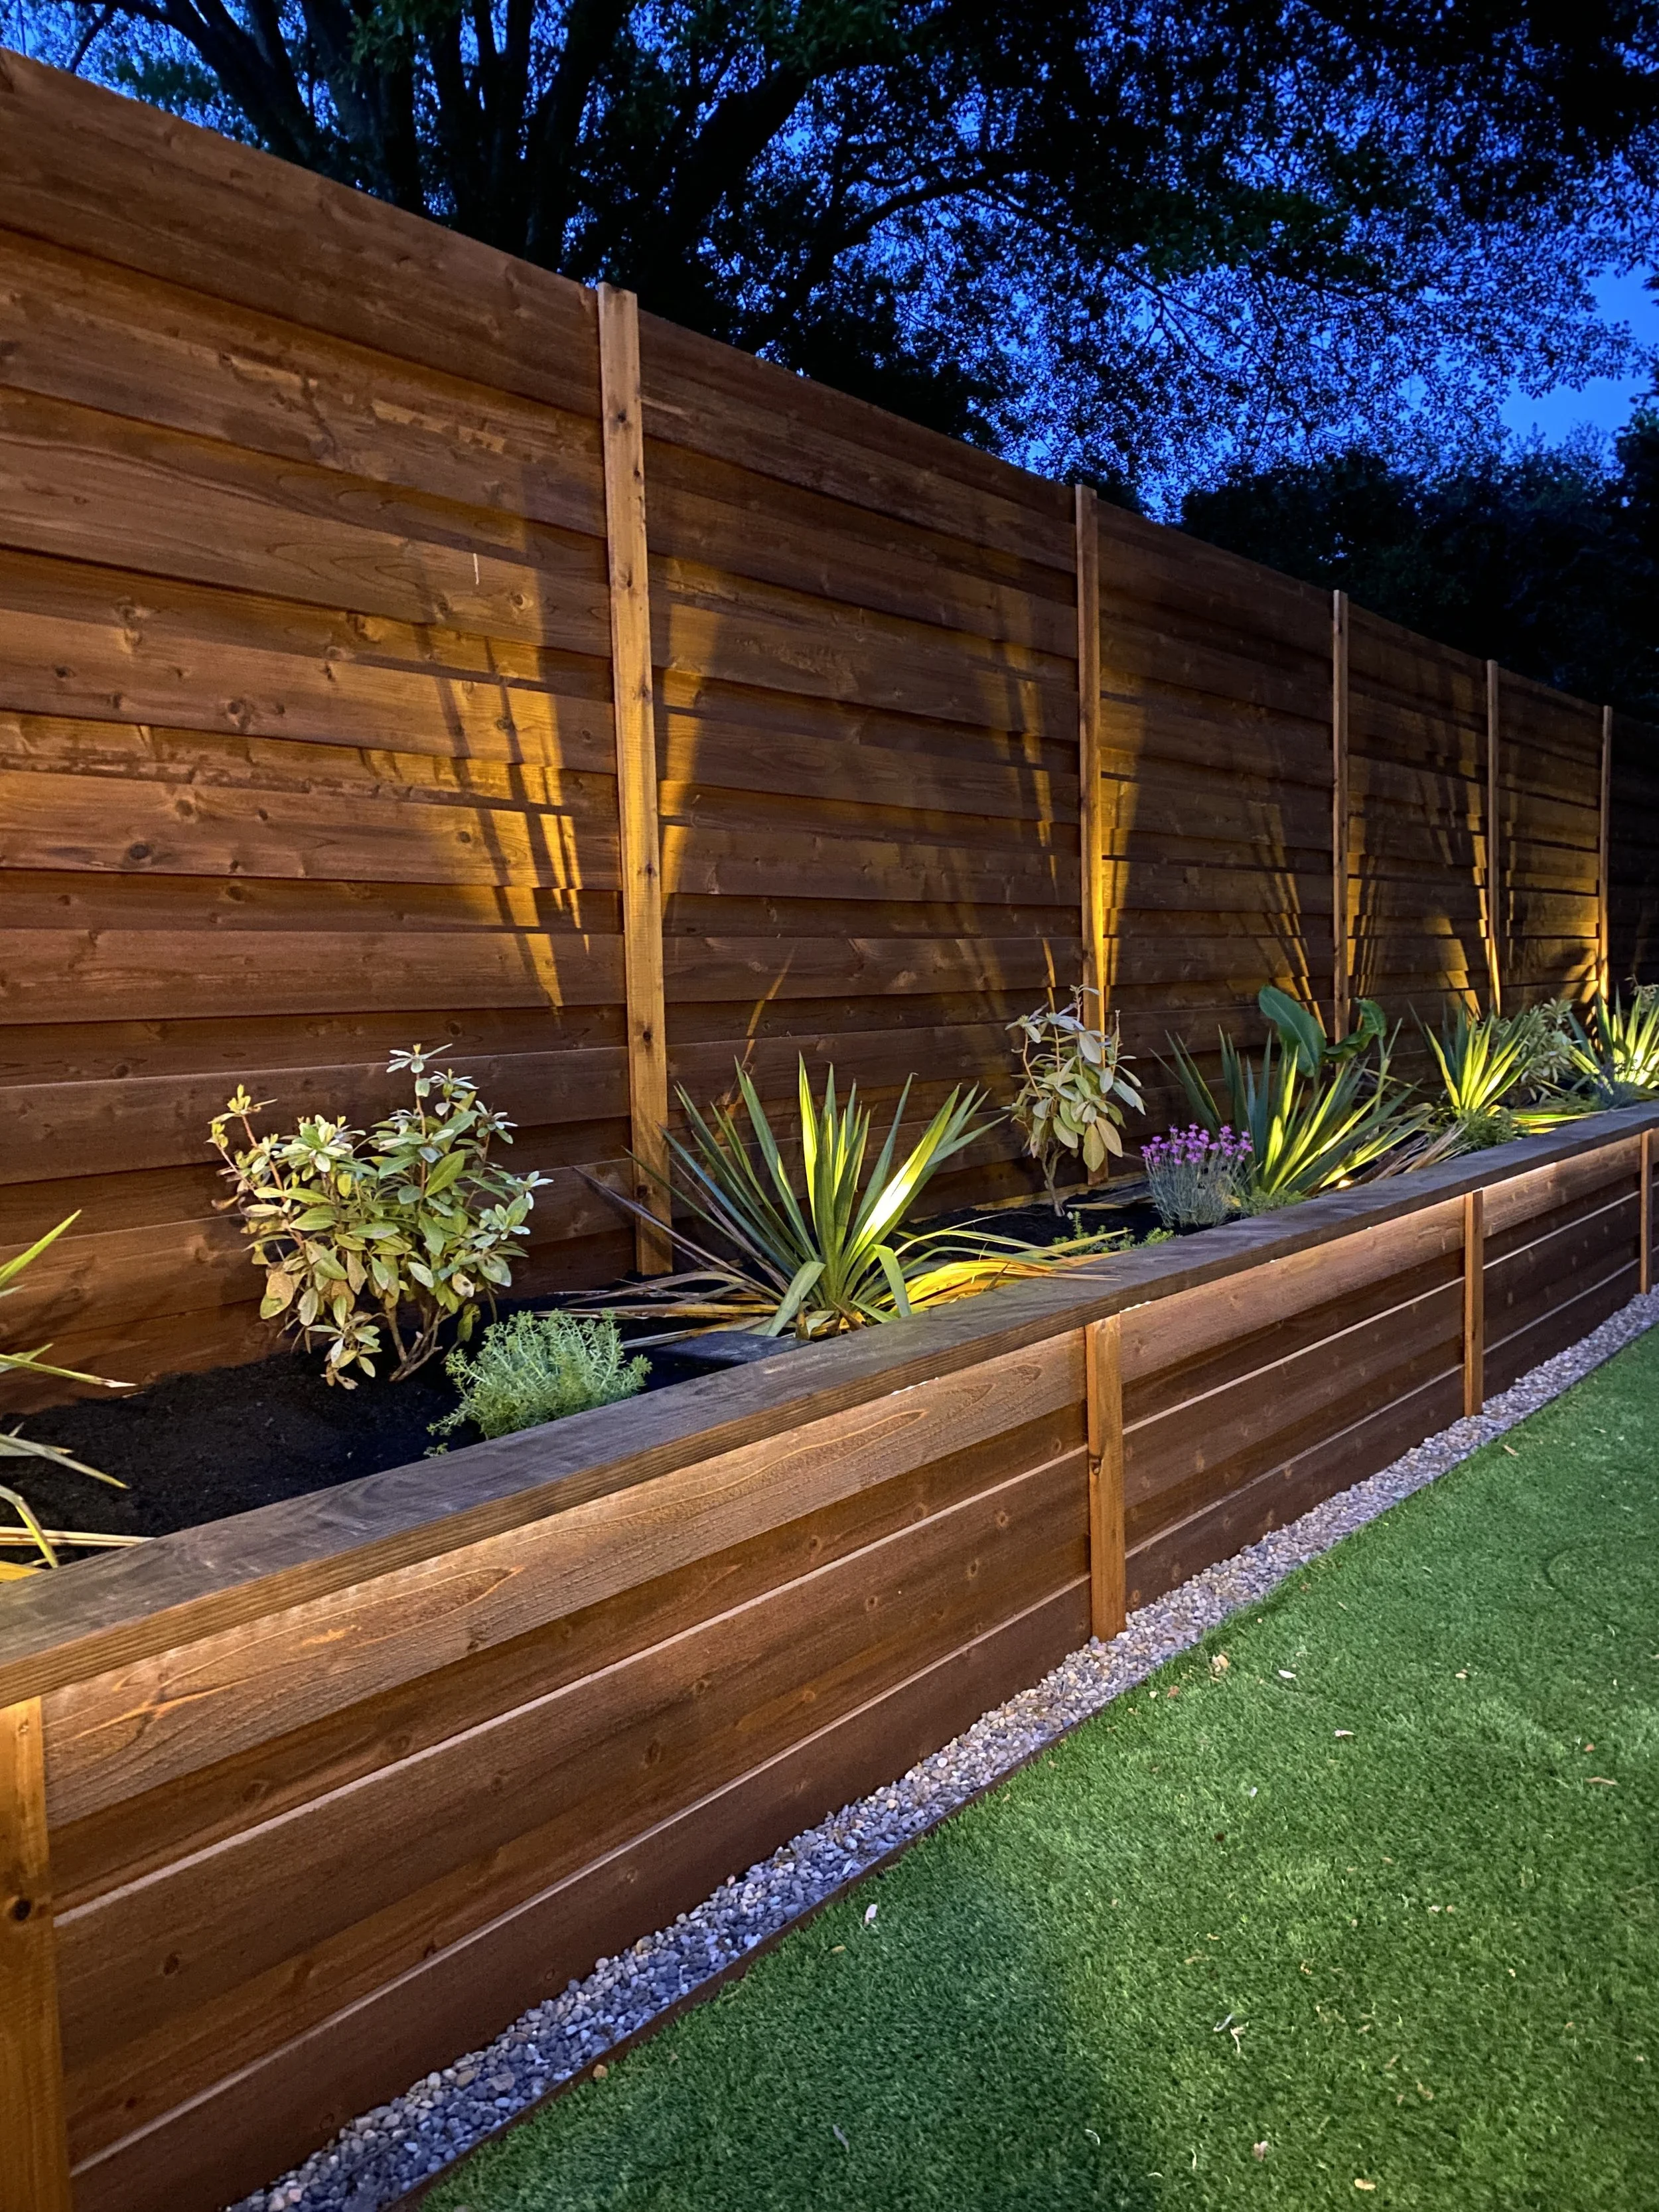
Landscape Lighting
I LOVE landscape lighting as an inexpensive way to brighten your space and set the mood!
All of my landscape lighting is solar, which makes it easy to install and relatively maintenance free. For this space, I used up lighting on my yuccas, strip downlighting under my wall seat, and flush puck lights between pavers. Amazon has a great selection of solar landscape lights to fit any yard.